Setup in 4 steps
You need two minutes in Odoo to create an API key. The rest needs no technical skills.
1 · Create an API key in Odoo
In Odoo, click your picture at the top → My Profile / Preferences → the Account Security tab → New API Key. Give it a description (for example Awsel), choose a duration, and copy the key right away: Odoo shows it only once.
- The key acts with the rights of the user who created it, so create it from a user with Accounting rights (and Sales / Purchase if you want quotations and purchase requests).
- In Odoo 19 keys last three months at most: when yours expires, create a new one and save it on the Account page.
- On Odoo Online, API access needs the Custom plan (it is not available on One App Free or Standard).
- Odoo 18 and older: you will also need the database name and your login email.
The key is the permission to read and write in your system — share it with nobody; you will save it only on our site, and it is stored encrypted.
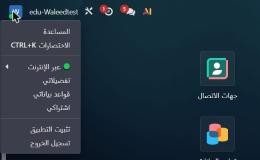
1. Click your picture at the top, then My Preferences (تفضيلاتي)
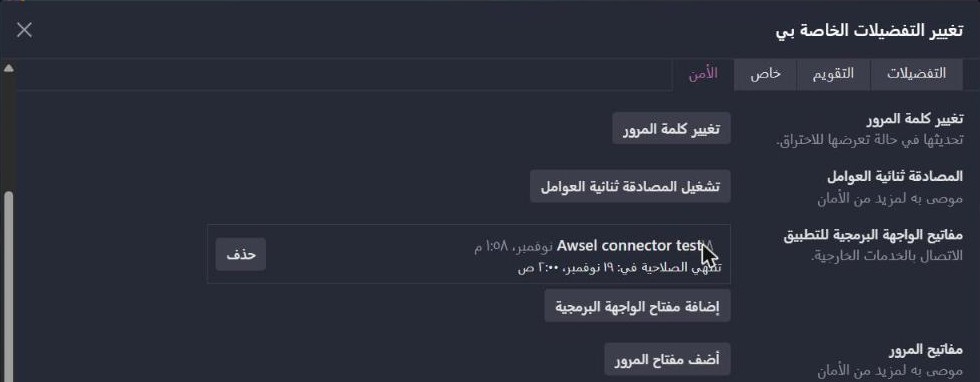
2. Security tab (الأمن) → New API Key (إضافة مفتاح الواجهة البرمجية)
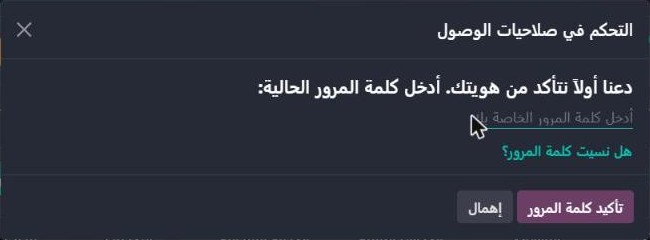
3. Odoo asks for your password to confirm
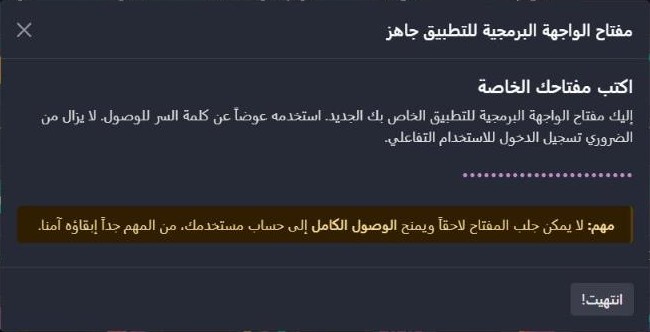
4. Copy the key right away: it is shown only once
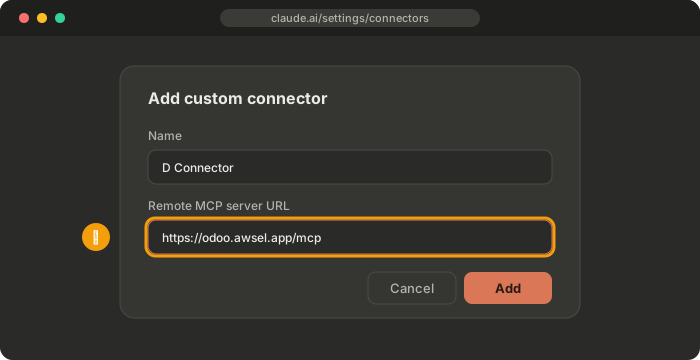
2 · Add the connector in your AI app
Copy this link:
https://odoo.awsel.app/mcp
- Claude: Settings → Connectors → Add custom connector → paste the link → Add.
- ChatGPT: turn on Developer mode in settings, then add the link as an app.
3 · Sign in and save the connection
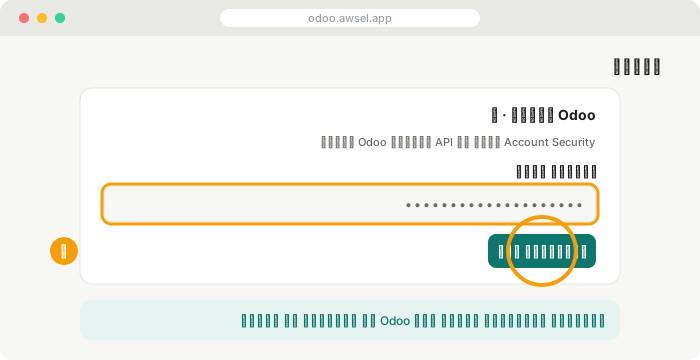
Your AI app opens our page: continue with Google, enter your Odoo address (like
https://mycompany.odoo.com) and the key from step 1, and click Allow. We
verify the key against your Odoo before saving it, and it is stored encrypted.
4 · Send your first document
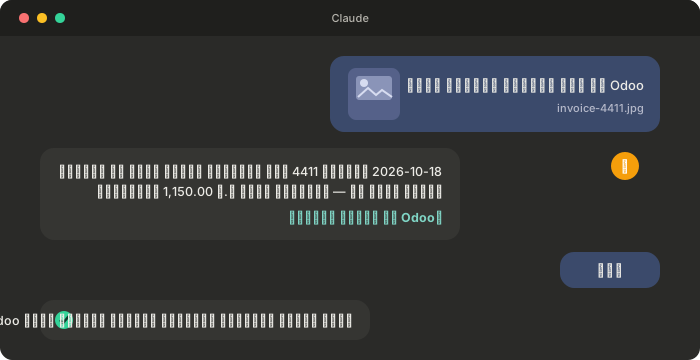
In the chat, send the invoice photo and write, for example: "Enter this vendor bill in Odoo". It shows you the summary first; after your yes it is saved as a draft in your system, and your team confirms it in Odoo as usual.
More messages that just work
- "Create a draft customer invoice for Horizon Co. with these lines".
- "Did we already record invoice 4411 from Al-Noor Co.?"
- "Find the vendor Modern Electricity Co. and show me its address and tax number".
- "What are the latest unpaid vendor bills?"
Menu names in AI apps can change. Your AI app may need a paid plan for custom connectors. Stuck? See the FAQ or write to sales@mea-is.com
Not affiliated with Odoo S.A. · Part of the Awsel family · Privacy · Terms · sales@mea-is.com